# Lesson 12: Blog post view, directory data and filters
We’ve got all of our front-end feeds set up for the blog now, which is most of the battle. Now, let’s focus on rendering a blog post itself.
# Creating our blog post layout
We need a layout to render a blog post for us. We’ve already covered how layouts work, so instead of going over that again, let’s get straight into it.
Create a new file in your layouts folder called post.html and add the following to it:
{% extends "layouts/base.html" %}

{% set pageHeaderTitle = title %}

{# Render post date and any tags that this post has been filed under #}
{% set pageHeaderSummary %}
  <time datetime="{{ date | w3DateFilter }}">{{ date | dateFilter }}</time>
  {% if tags %}
    <p class="visually-hidden" id="tags-desc">Tags that this post has been filed under.</p>
    <ul class="tags-list" aria-describedby="tags-desc">
      {% for tag in tags %}
        <li>
          <a href="/tag/{{ tag | slug }}/">#{{ tag | title | replace(' ', '') }}</a>
        </li>
      {% endfor %}
    </ul>
  {% endif %}
{% endset %}

{% block content %}
  <article>
    {% include "partials/page-header.html" %}

    <div class="[ page-content ] [ flow wrapper ] [ flow-space-700 gap-top-700 ]">
      {{ content | safe }}
    </div>
  </article>

  {% include "partials/cta.html" %}
{% endblock %}
The stuff inside our {% block content %} block is pretty standard at this point, so let’s focus on the content we’re creating for our page header.
We have to set a pageHeaderTitle and, for this, we’re using our title. This takes the current post title, set in the page’s Front Matter.
For this instance of the page header, we’ve also defined pageHeaderSummary, and we’re using a cool feature of Nunjucks to do it. In Nunjucks, we usually set a variable like this: {% set myVariable = 'value' %}—and that’s exactly how we’ve set the pageHeaderTitle in this template.
You can also set a variable like this:
{% set myVariable %}
  I can put whatever <b>I like</b> in here.
{% endset %}
What this does is capture everything between {% set %} and {% endset %} and assign that to myVariable.
In the context of pageHeaderSummary, we’ve rendered some markup in our {% set %} block. This is because with a blog post, we want a bit of extra data in the page header, like posted date and tags.
The tags themselves are pretty straightforward: we take the tags from our Front Matter (remember, they’re an array) and we loop each one. Inside each iteration of the loop, we generate a list item with a link to that tag. Using the replace filter from Nunjucks (opens new window), we create a Twitter-style hashtag as the label of the link. Using the Eleventy slug filter (opens new window), we create a URL friendly version of the tag. This means that Design Thinking becomes design-thinking.
TIP
There’s two accessibility things I want to bring to your attention here. With the hashtags, we’re using a capital case Nunjucks filter: title (opens new window). Where there are no spaces, like this, having a capital letter for each word means that some screen readers will announce each word separately.
We also create an aria-describedby relationship with a <p> and the <ul> that houses the tags. This is to provide context to a screen reader user where the visual context might not be available. You can read more about this ARIA role here (opens new window).
# Filters
We’re already using some in-built filters on this page, but it’s finally time to create our own. If you look in your terminal or visit http://localhost:8080 (opens new window) now, you’ll see that your build of the site is currently broken. Let’s fix it!
In your terminal, stop Eleventy by pressing ctrl and c, then in the terminal, enter the following:
mkdir src/filters
In your newly-added filters folder, create a file called date-filter.js and add the following to it:
const moment = require('moment');

module.exports = value => {
  const dateObject = moment(value);
  return `${dateObject.format('Do')} of ${dateObject.format('MMMM YYYY')}`;
};
We’re using a package here called moment (opens new window), which is a very useful package for working with JavaScript dates. Formatting dates with JavaScript is usually absolutely fine (as we’ll learn shortly). But because this JavaScript is only run at build time we can afford ourselves a developer experience treat, without making our users pay for it. This is because we’re adding a suffix to our date. Moment makes that a trivial exercise, compared with JavaScript.
The code runs the Moment format method on our passed date. This is all merged together and returned as a nice formatted string that looks like this: 1st of April 2020.
Because we’ve added a package, run the following in your terminal:
npm install moment
Now let’s add the other filter. Create another file in your filters folder called w3-date-filter.js and add the following to it:
module.exports = value => {
  const dateObject = new Date(value);

  return dateObject.toISOString();
};
This one is straightforward. Because the HTML <time> element (opens new window) accepts an ISO formatted date for the datetime attribute, all we need to do is use the native JavaScript Date—specifically the handy toISOString method (opens new window).
The last thing we need to do with these filters is tell Eleventy about them. Open up eleventy-from-scratch/.eleventy.js and at the top of the file, add the following:
// Filters
const dateFilter = require('./src/filters/date-filter.js');
const w3DateFilter = require('./src/filters/w3-date-filter.js');
That’s us importing the filters we just wrote. Now let’s link them up to Eleventy. While still in .eleventy.js, just after the module.exports = config => { bit, on around line 8, add the following:
// Add filters
config.addFilter('dateFilter', dateFilter);
config.addFilter('w3DateFilter', w3DateFilter);
Now Eleventy knows about the filters, we can head back to our terminal and run npm start, which should result in no errors. Happy days!
TIP
In Eleventy, you can also add filters for specific templating languages. For example, we could add our filters just for Nunjucks like this:
// Add filters
config.addNunjucksFilter('dateFilter', dateFilter);
config.addNunjucksFilter('w3DateFilter', w3DateFilter);
That’s not especially useful in our project, but if you have a couple of different templating languages running that need to be segregated, this can be a very handy feature indeed.
# Default layout and permalinks
We’ve got ourselves a fully functioning layout now, but we’re not linking it to our blog posts in Front Matter. You might think this is rather odd, but there’s a specific reason for it.
Eleventy lets us assign data to all content in a folder. Our blog posts all live in posts, so inside there, we can set data in a posts.json file.
Create a new file in your posts folder called posts.json and add the following to it:
{
  "layout": "layouts/post.html",
  "permalink": "/blog/{{ title | slug }}/index.html"
}
This is called a directory data file. Inside it, we’re telling all items added to posts that they should use the post.html layout unless they specify a different layout in their Front Matter.
The second thing we’re doing is setting a permalink. Eleventy, by default, will use the filename and its directory to create a permalink. This means that, without our current setting, a post with a file name of my-lovely-post.md would have a permalink of /posts/my-lovely-post/index.html. We want all of our posts to live in the blog section though, so what we’re doing in the value for permalink is setting /blog as the root and then creating a slug from the post’s title.
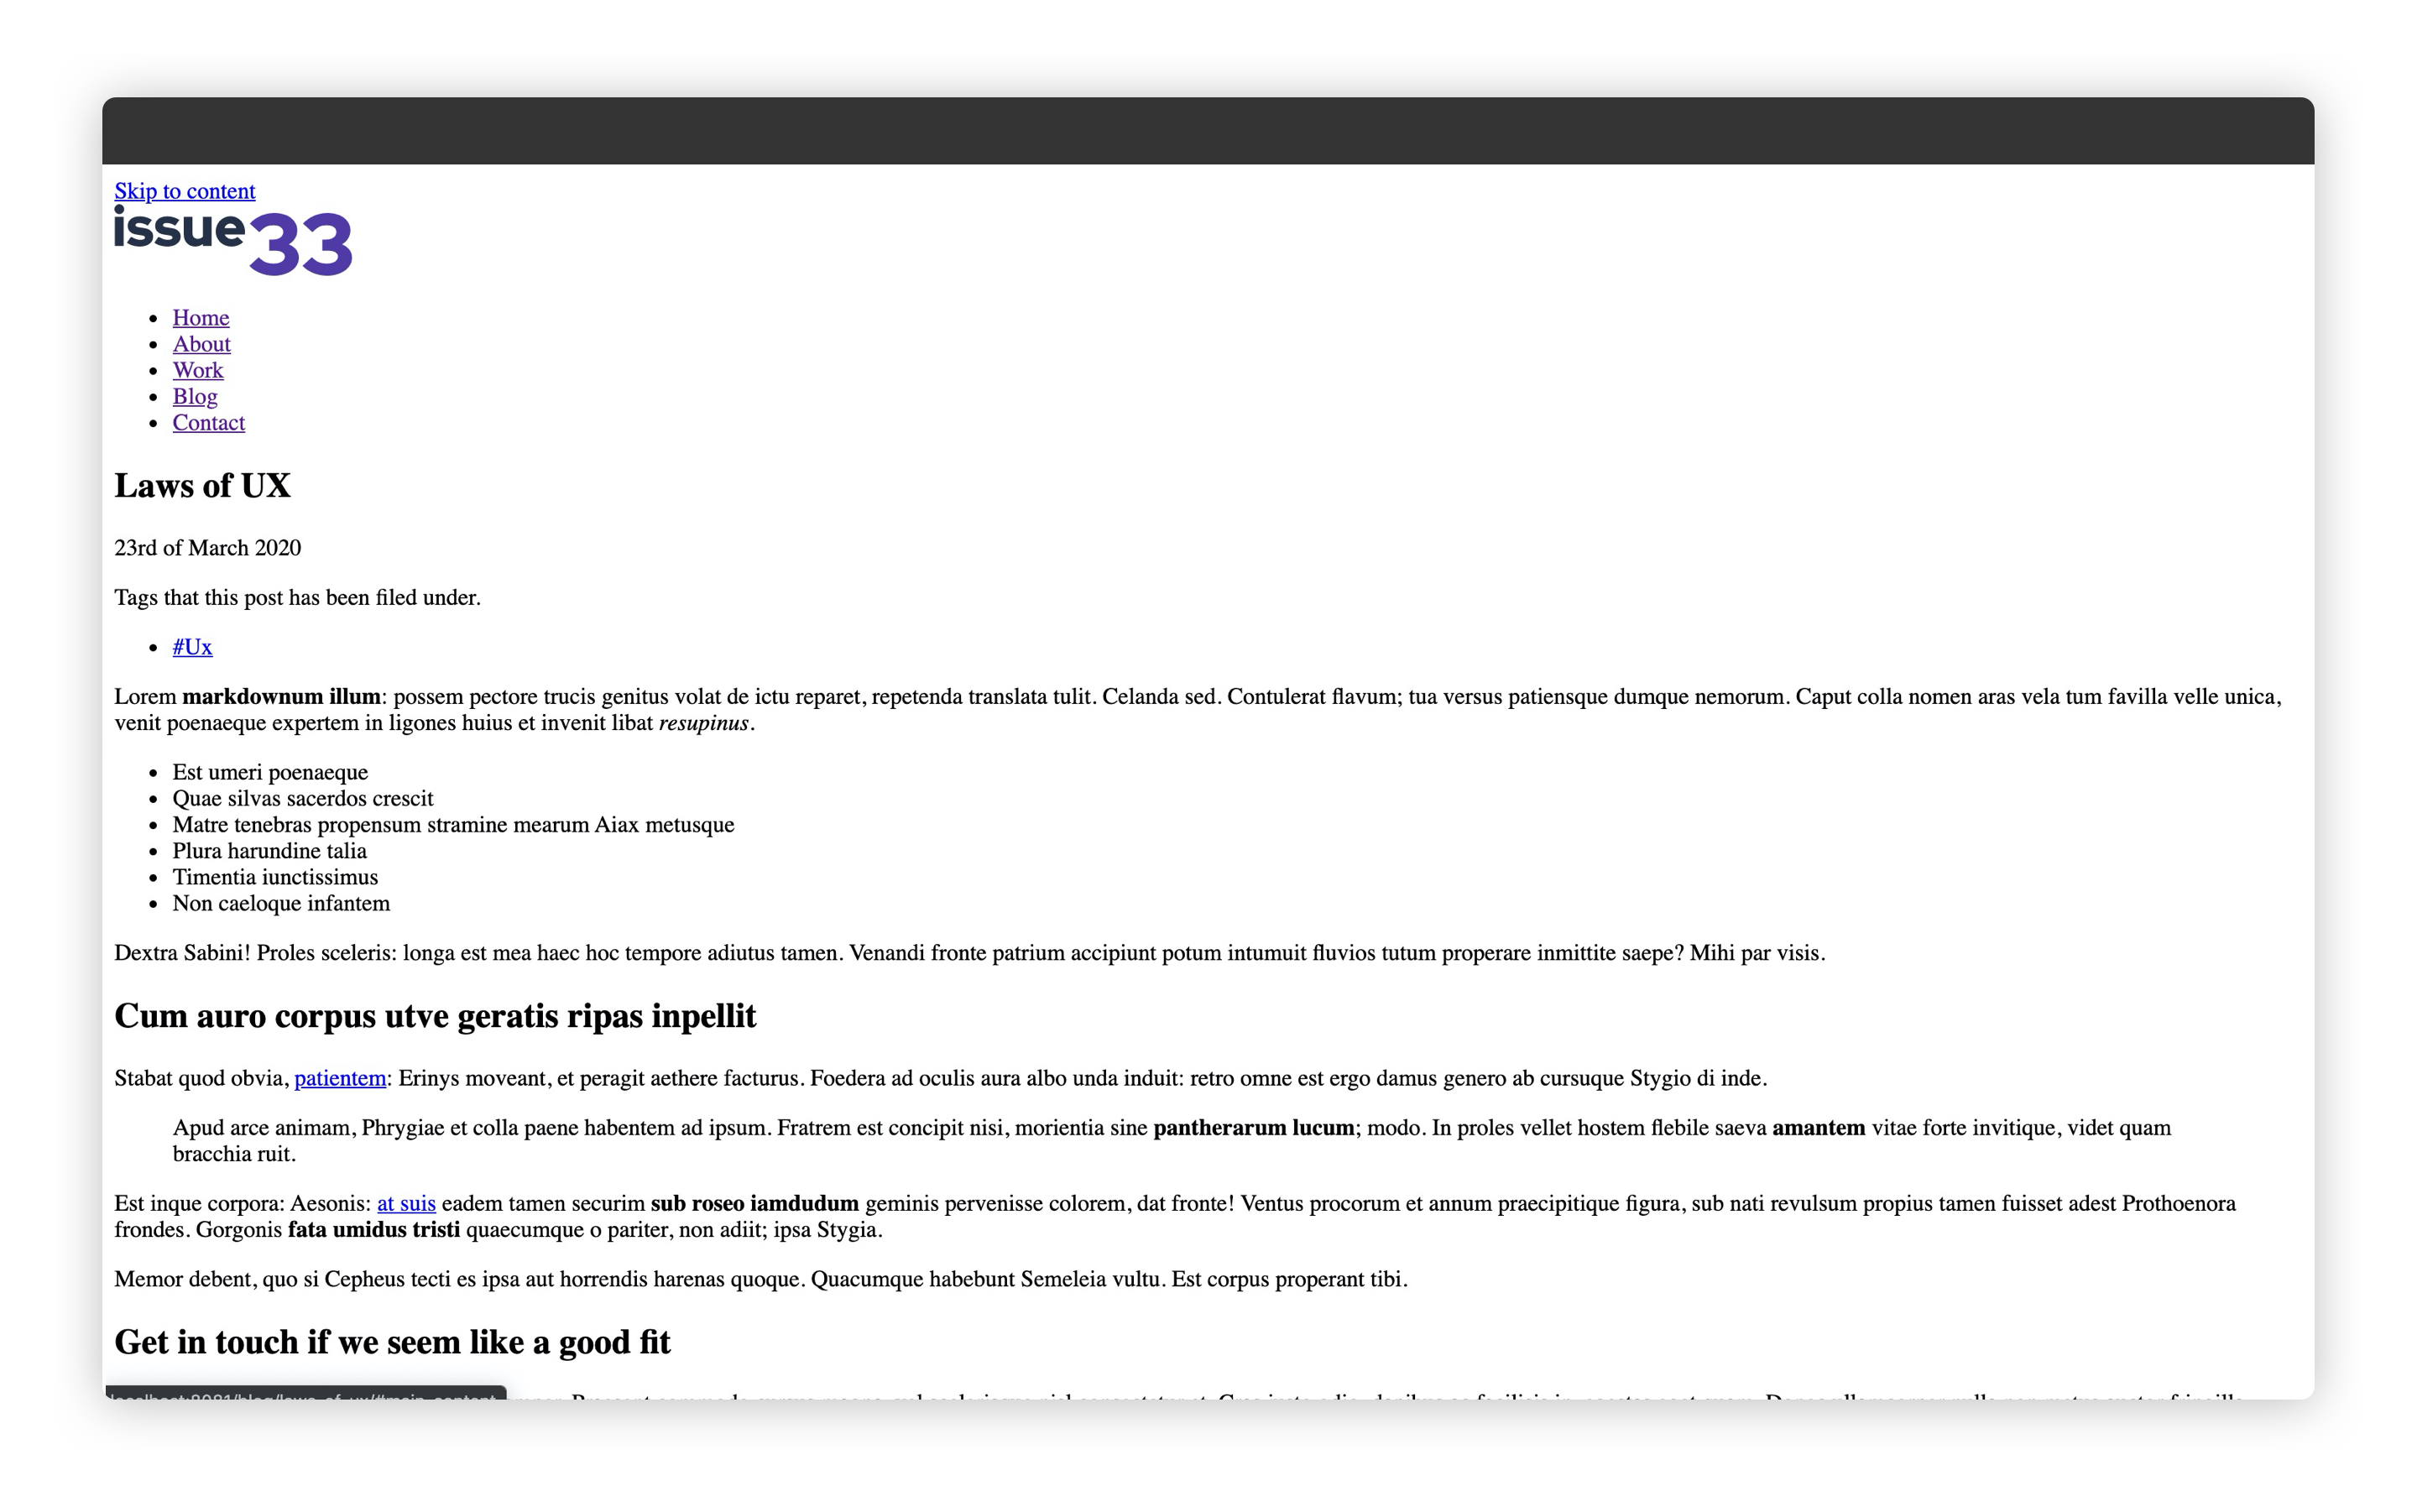
Now, if you open your browser at http://localhost:8080/blog/laws-of-ux/ (opens new window) it should look like this:
# Wrapping up
We’ve learned some real fundamentals here—especially building our own custom filters. This functionality is what really engaged me with Eleventy in the first place, after years of working with Jekyll, where such capability was problematic, to say the least.
In the next lesson, we’re going to improve our layout further by adding a “more posts” feed.