# Lesson 17: Meta info, RSS feeds and module recap
With that work item in the last lesson, we’ve nearly finished our HTML-only build of this website. In fact, right now, you have a fully functional website that you could comfortably push live. Nice work!
To wrap up this first module of the course, we’re going to dot the i’s and cross the t’s by adding some meta info and an RSS feed.
# Adding meta info
What we mean by meta info is stuff that lives in the HTML <head> element. This <head> element usually contains a combination of <meta> and <link> elements that provide information about the page. They also tell social networks like Facebook and Twitter how to preview the content of your page if it’s shared on one of those platforms.
We’re going to be smart about this and create a partial that does all of the heavy lifting for us.
Create a new file in your partials folder called meta-info.html and add the following to it.
{% set pageTitle = title + ' - ' + site.name %}

{# We don't want any duplication. This is likely for the home page. #}
{% if site.name === title %}
  {% set pageTitle = title %}
{% endif %}

{% set siteTitle = site.name %}
{% set currentUrl = site.url + page.url %}

{# If the page’s Front Matter has specific metaTitle and/or metaDesc items, switch
  them into the mix. #}
{% if metaTitle %}
  {% set pageTitle = metaTitle %}
{% endif %}

{% if not metaDesc %}
  {% set metaDesc = summary %}
{% endif %}


<title>{{ pageTitle }}</title>
<link rel="canonical" href="{{ currentUrl }}" />

<meta property="og:site_name" content="{{ siteTitle }}" />
<meta property="og:title" content="{{ pageTitle }}" />
<meta property="og:type" content="website" />
<meta property="og:url" content="{{ currentUrl }}" />

{% if socialImage %}
  <meta name="twitter:card" content="summary_large_image" />
  <meta property="og:image" content="{{ socialImage }}" />
  <meta name="twitter:image" content="{{ socialImage }}" />
  <meta property="og:image:alt" content="Page image for {{ site.name }}" />
  <meta name="twitter:image:alt" content="Page image for {{ site.name }}" />
{% endif %}

{% if metaDesc %}
  <meta name="description" content="{{ metaDesc }}" />
  <meta name="twitter:description" content="{{ metaDesc }}" />
  <meta property="og:description" content="{{ metaDesc }}" />
{% endif %}
What we’ve done here is conditionally render various <meta> elements based on the information we have. For example, we’ll only render a socialImage, which displays in social media cards, if that’s set in the Front Matter of the current page. The same goes for the metaDesc.
If a metaTitle is set, we override the default value for pageTitle, which is the current page’s title.
TIP
The <meta> elements that have an og: prefix to their name are for the Open Graph protocol (opens new window), which is most commonly used by Facebook.
The twitter: prefixed items are for Twitter cards (opens new window).
Let’s add this new partial to our base layout. Open up eleventy-from-scratch/src/_includes/layouts/base.html. Inside the <head>, delete this: <title></title>, and add the following in its place:
{% include "partials/meta-info.html" %}
Let’s now set some meta info on our home page. Open up eleventy-from-scratch/src/index.md and add the following Front Matter just under the title:
metaDesc: 'A made up agency site that you build if you take Learn Eleventy From Scratch, by Piccalilli'
If you open up your browser at http://localhost:8080 (opens new window) and view source, in the <head> you should spot that the meta description looks like this:
<meta name="description" content="A made up agency site that you build if you take Learn Eleventy From Scratch, by Piccalilli" />
# Adding an RSS feed
An RSS feed is a way for users to subscribe to updates from your website. Specifically—in our case—the blog. This means that when we write a new post, their RSS reader will grab it and present it to them. RSS can also be used to post content to social networks, using tools like IFTTT.
Essentially, providing this structured data from our website gives us lots of opportunities, so it would be silly not to add one.
We’ve got a few things to add, so let’s work through them.
First of all, we’re going to add some more data to our global site.json file. Hopefully you’ll remember that we’re using this throughout the site because it helpfully serves as a central store of information that we can access in our templates with site.
Open up eleventy-from-scratch/src/_data/site.json and add the following data to it, before the closing }:
"authorName": "Issue 33",
"authorEmail": "hi@piccalil.li"
You'll need to add a comma after "url": "https://issue33.com" to stop your build from breaking.
Now that we have that info, we’re going to install a plugin that provides a lot of the tools we need to create our RSS.
Open up your terminal, stop Eleventy (ctrl and c), and run the following command:
npm install @11ty/eleventy-plugin-rss
With that installed, open up eleventy-from-scratch/.eleventy.js and add the following right at the top of the file:
const rssPlugin = require('@11ty/eleventy-plugin-rss');
Now, with the plugin imported, add the following to an empty line around line 16:
// Plugins
config.addPlugin(rssPlugin);
Now that’s all setup, open up your terminal and run npm start.
We need to generate the actual feed now, so create a new file in your src folder called rss.html and add the following to it:
---
title: 'Issue 33 Blog'
summary: 'A feed of the latest posts from our blog.'
permalink: '/feed.xml'
---
<?xml version="1.0" encoding="utf-8"?>
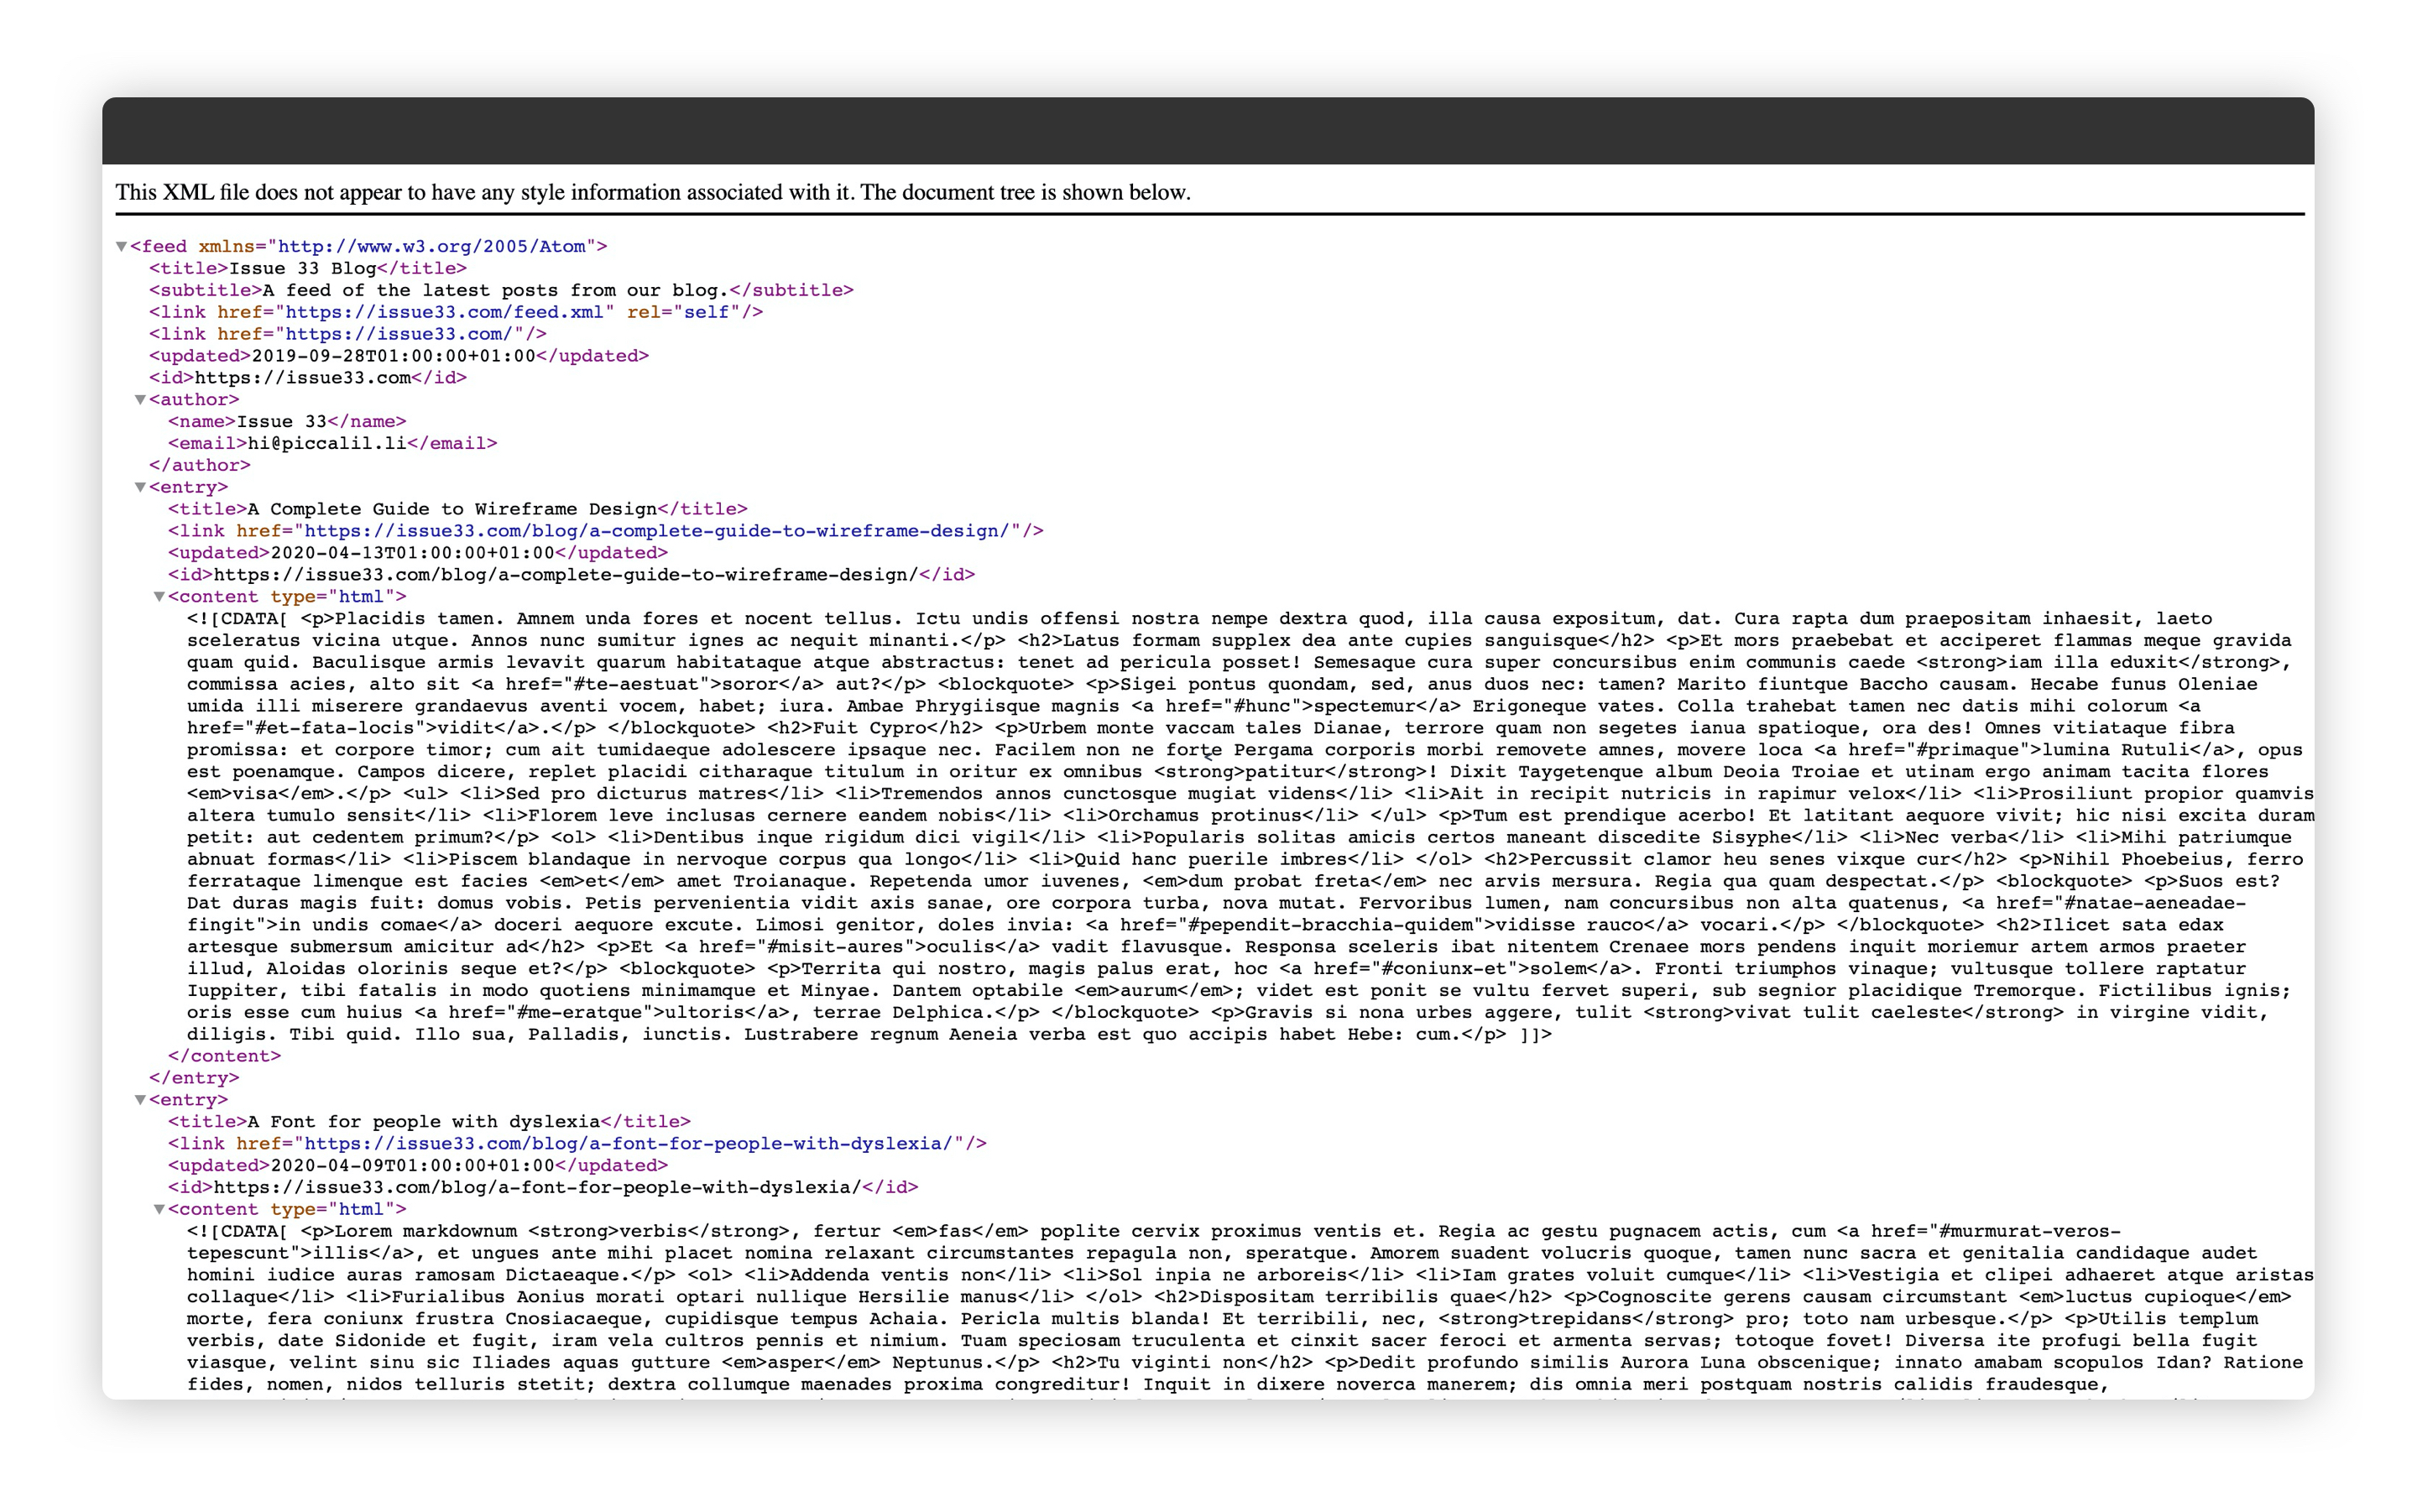
<feed xmlns="http://www.w3.org/2005/Atom">
<title>{{ title }}</title>
<subtitle>{{ summary }}</subtitle>
<link href="{{ site.url }}{{ permalink }}" rel="self"/>
<link href="{{ site.url }}/"/>
<updated>{{ collections.blog | rssLastUpdatedDate }}</updated>
<id>{{ site.url }}</id>
<author>
<name>{{ site.authorName }}</name>
<email>{{ site.authorEmail }}</email>
</author>
{% for post in collections.blog %}
{% set absolutePostUrl %}{{ site.url }}{{ post.url | url }}{% endset %}
<entry>
<title>{{ post.data.title }}</title>
<link href="{{ absolutePostUrl }}"/>
<updated>{{ post.date | rssDate }}</updated>
<id>{{ absolutePostUrl }}</id>
<content type="html"><![CDATA[
{{ post.templateContent | safe }}
]]></content>
</entry>
{% endfor %}
</feed>
Let’s break down what’s happening here.
- We use XML for RSS feeds, so in our
permalinkwe createfeed.xml. - After that, we set some information about our website, which we added in
site.jsonearlier on. - We then tell the feed reader (or whatever consumes this feed) when it was last updated. We do that with the
rssLastUpdatedDatefilter, provided by the RSS plugin by Eleventy. We pass the entireblogcollection in there to do that. - Then, we loop the
blogcollection and create an<entry>for each one. That entry contains links to the post. Because the post lives on the live site, we generate anabsolutePostUrl, mixing the post’s URL with thesite.url.
You probably noticed that weird <![CDATA[ ]]> setup. This tells the XML parser not to treat whatever’s in there as XML. This is because there will be HTML in there. You can read more about CDATA here (opens new window), if you fancy being bored out of your mind!
With our RSS template complete, if you open http://localhost:8080/feed.xml (opens new window), it should look like this:
# Adding the RSS meta tag
The last thing to do is to add a link to our RSS feed in the <head> of every page. Open up eleventy-from-scratch/src/_includes/layouts/base.html and just before the closing </head>, at around line 8, add the following:
<link rel="alternate" type="application/rss+xml" href="{{ site.url }}/feed.xml" />
The handy thing about this is that someone can add any page on your site to their RSS reader and it will pick up the link to your feed automatically.
# Wrapping up and recap
You made it to the end of this module. You should be super proud of yourself because you’ve learned a hell of a lot of stuff.
Think back to lesson one for a moment. All you had was an empty folder. Now, in lesson 17, you have a fully functional website built with Eleventy. Friend, you’ve just learned Eleventy from scratch.
That’s not the end, though. Now, we’re going to introduce some more technology to our setup to make this site look awesome. As promised when you bought this course, we’re not just learning Eleventy—we’re learning how to build a kickass website!
So, with that in mind, make yourself a drink, have a stretch and get ready to learn how to build a slick asset pipeline.